Bill Pay: Setting Up Groups and Making Changes
This article covers steps for the previous version of Bill Pay. If you are using the updated Bill Center experience, go to Bill Center: How to create a group, Bill Center: How to edit a group or Bill Center: How to delete a group.
Members can group payees together as a way to organize their list of billers. You can also watch the quick video.
Mobile
If you're using a mobile device, follow the steps below. For computers, go to the desktop steps
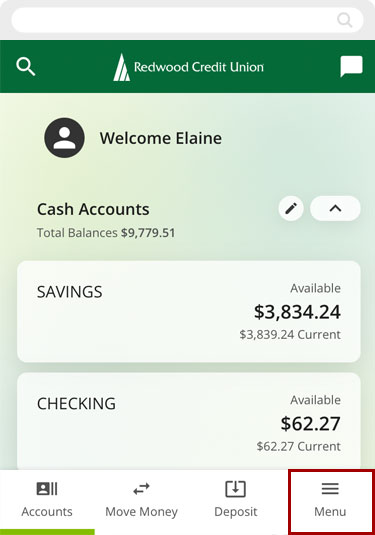
Select Menu at bottom right.
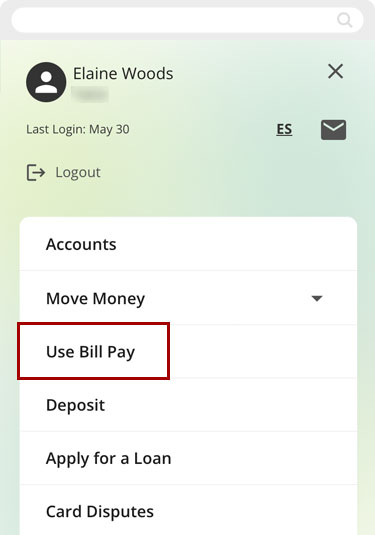
Select Use Bill Pay.
Creating Groups
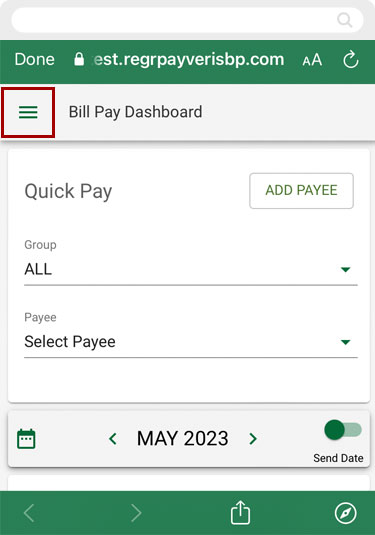
Tap the top left menu icon.
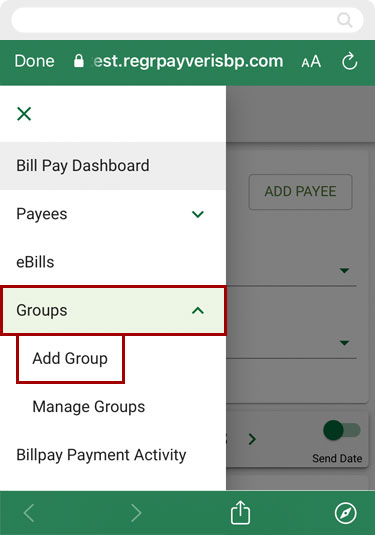
Tap Groups and select Add Group.
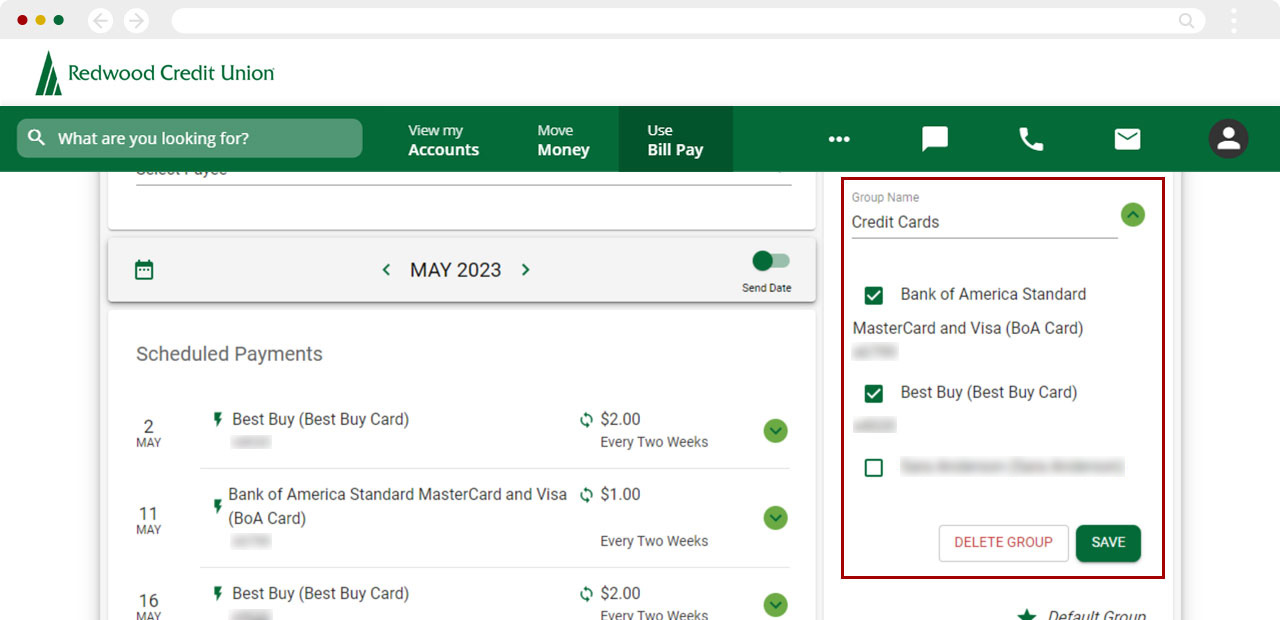
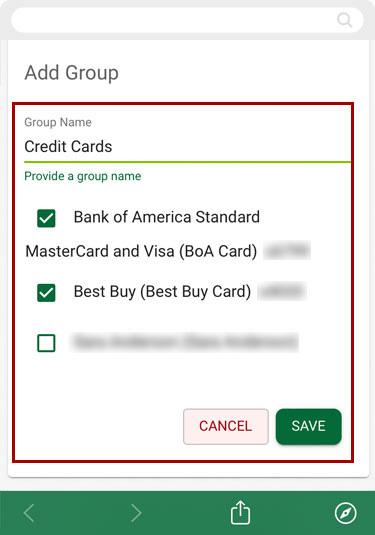
Enter in a Group Name, check the boxes to select the payees you want to save under that group name, and select SAVE to create your new group.
Deleting/Changing Groups
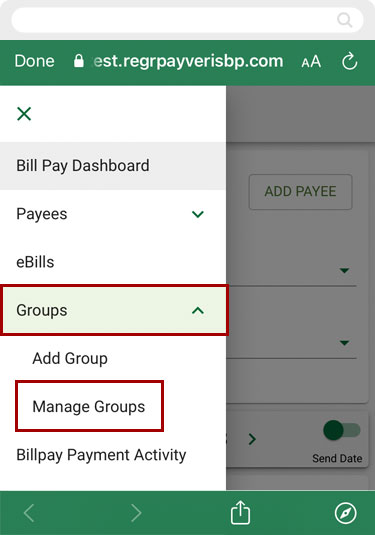
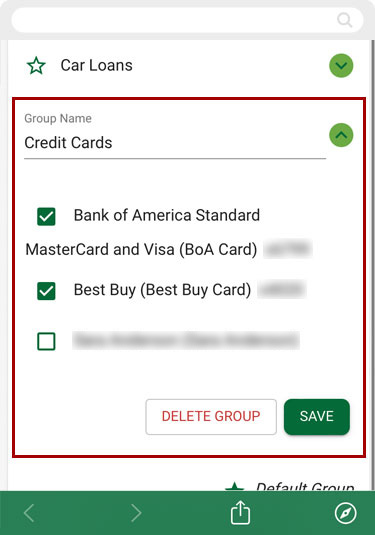
From the top left menu, tap Groups and select Manage Groups.
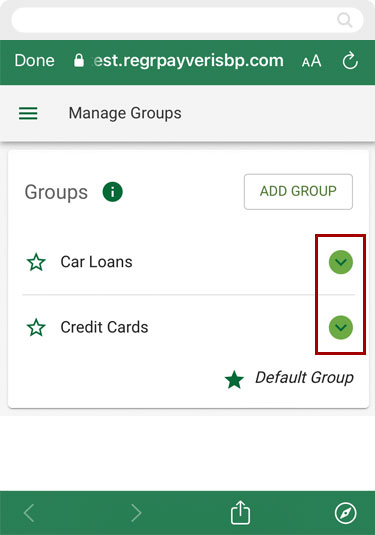
Select the down arrow next to the group you want to update.
Make the desired changes and Save, or Delete the group altogether.
Note: You can also change the name of the group and select or deselect payees as needed.
Desktop
If you're using a computer, follow the steps below. For mobile devices, go to the mobile steps
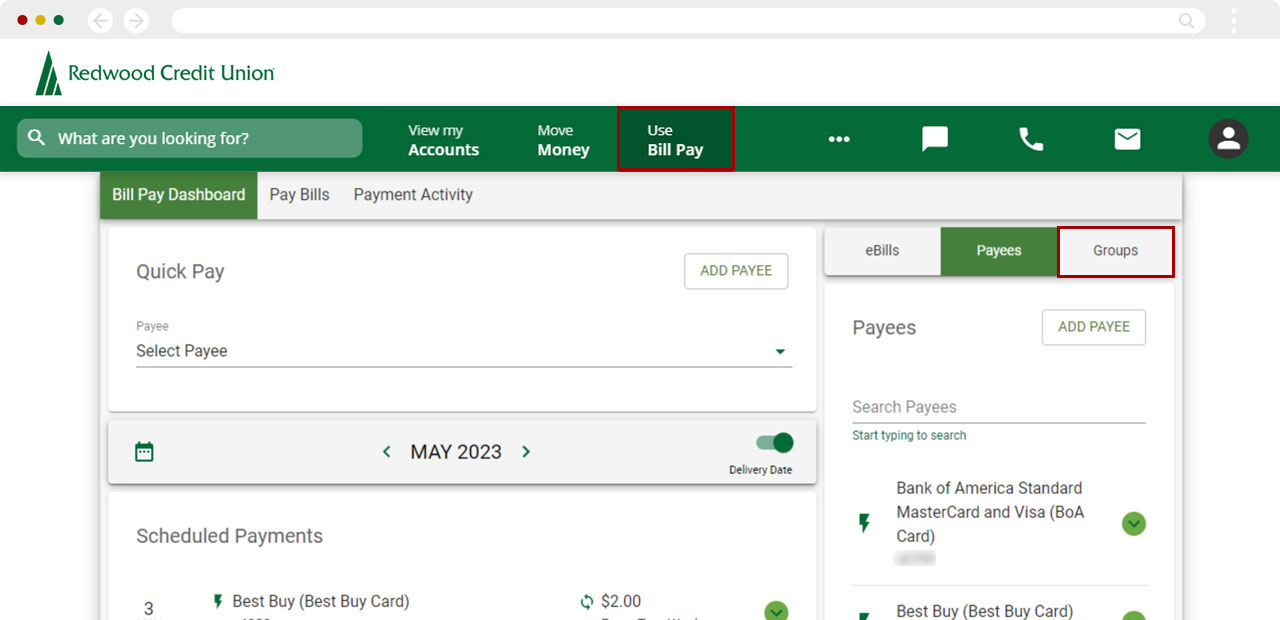
From the top menu bar, select Use Bill Pay, then on the right sidebar, choose Groups.
Creating Groups
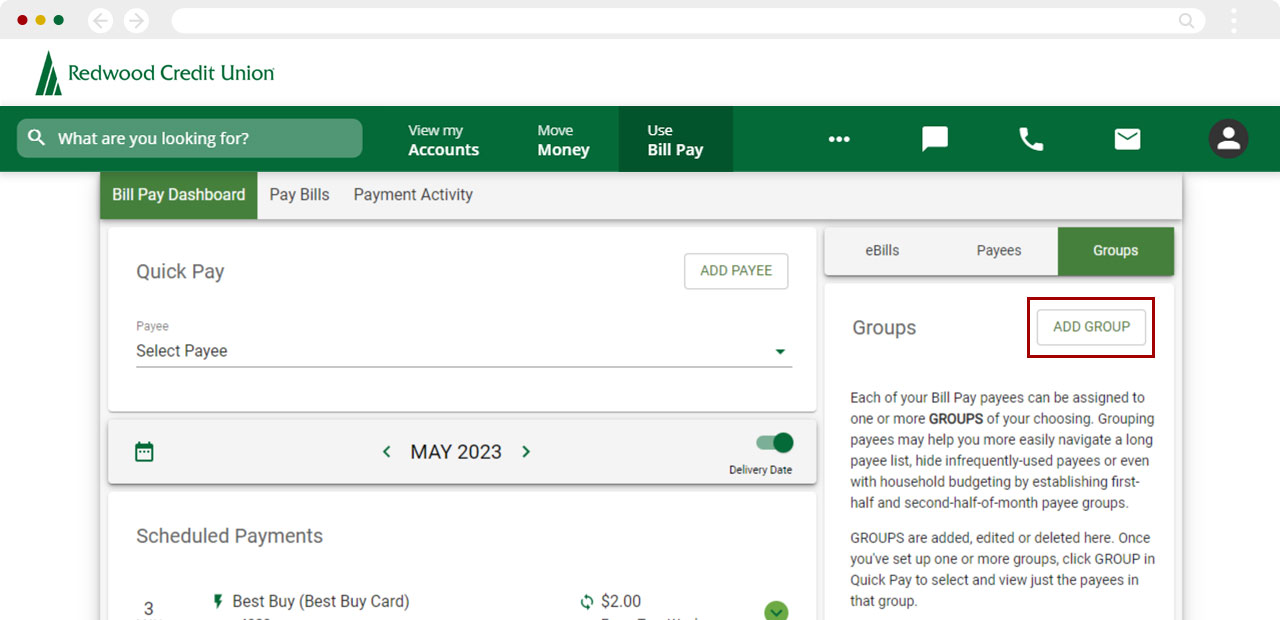
Select ADD GROUP.
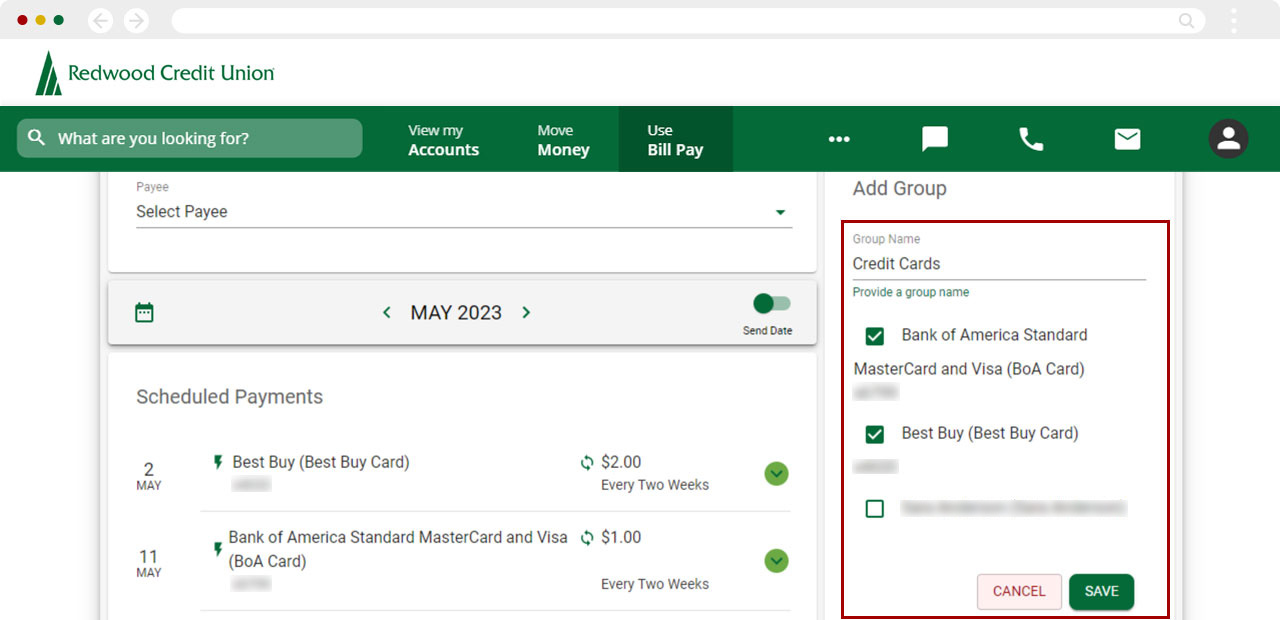
Type in a Group Name, check the boxes to select the payees you want to save under that Group name, and select SAVE to create your new group.
Deleting/Changing Groups
Under Groups, select the down arrow next to the group you want to update.
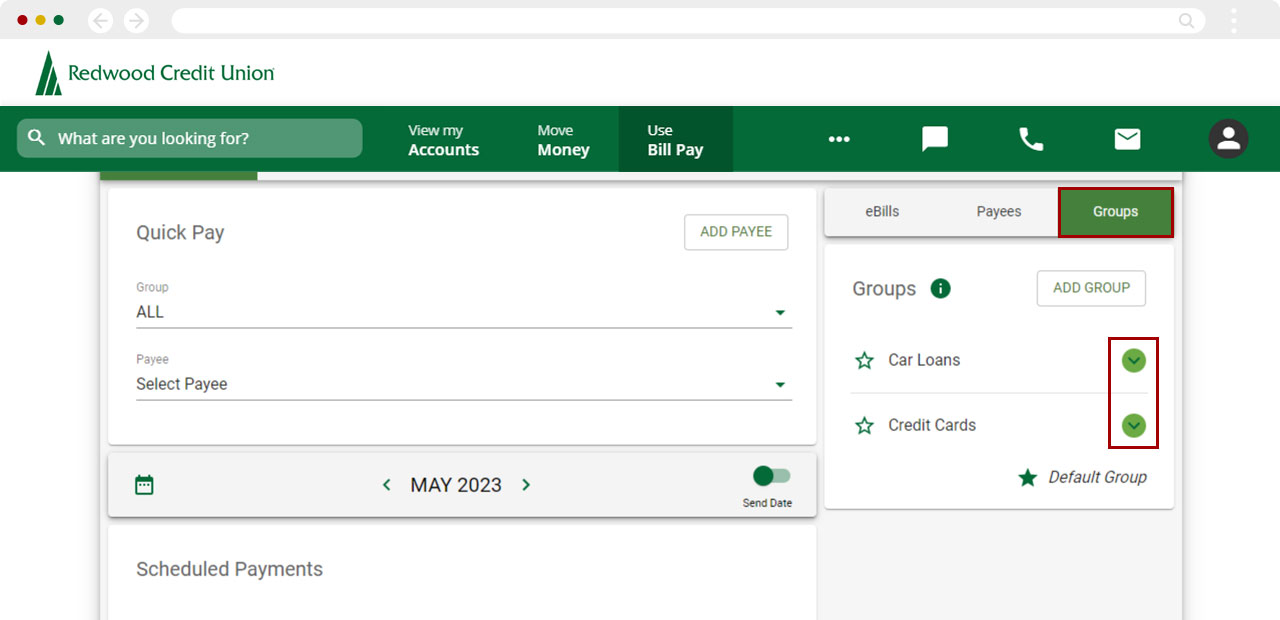
Make the desired changes and Save, or Delete the group altogether.
Note: You can change the name of the group and select or deselect payees as needed.
